
The Microsoft Surface Laptop 5 is known for its sleek design and powerful performance. However, one aspect that has drawn criticism from tech enthusiasts is the somewhat tricky design of the internal SSD replacement. If you’re looking to replace the SSD on your Surface Laptop 5, this guide will walk you through the process and highlight the key differences you need to be aware of.
Before You Begin:
Before you embark on this SSD replacement journey, there are a few things you need to ensure:
- Backup Your Data: Make sure to back up all your important data to an external drive or a cloud service. You don’t want to lose any precious files during the upgrade process.
- Tools and Parts: You will need the appropriate tools, including a screwdriver set, and a new SSD that’s compatible with your Surface Laptop 5 (M.2 2230).
Steps to Replace the SSD on Your Surface Laptop 5:
- Shut Down and Unplug Your Laptop: Turn off your laptop and disconnect all external devices. Safety first!
- Flip It Over: Lay your Surface Laptop 5 face down on a soft, clean surface.
- Remove the feet: The rubber pads on the laptop can be removed easier by sticking a thin tool under into the side closest to the edge of the laptop.
- Remove the Screws: There are 4 screws holding the back cover in place. Carefully unscrew these. Keep track of where each screw came from, as they can be different lengths.
- Open the laptop: The laptop opens from the keyboard side, it is held together with magnets. Pull gently on the keyboard cover from the edges closest to the display.
- Locate the SSD: Once the back cover is removed, you’ll find the SSD. In the Surface Laptop 5, Microsoft has designed it to be partly exposed, making it accessible without removing additional components.
- Disconnect the Old SSD: Carefully disconnect the old SSD by gently pulling it out of its slot. Be sure to handle it with care.
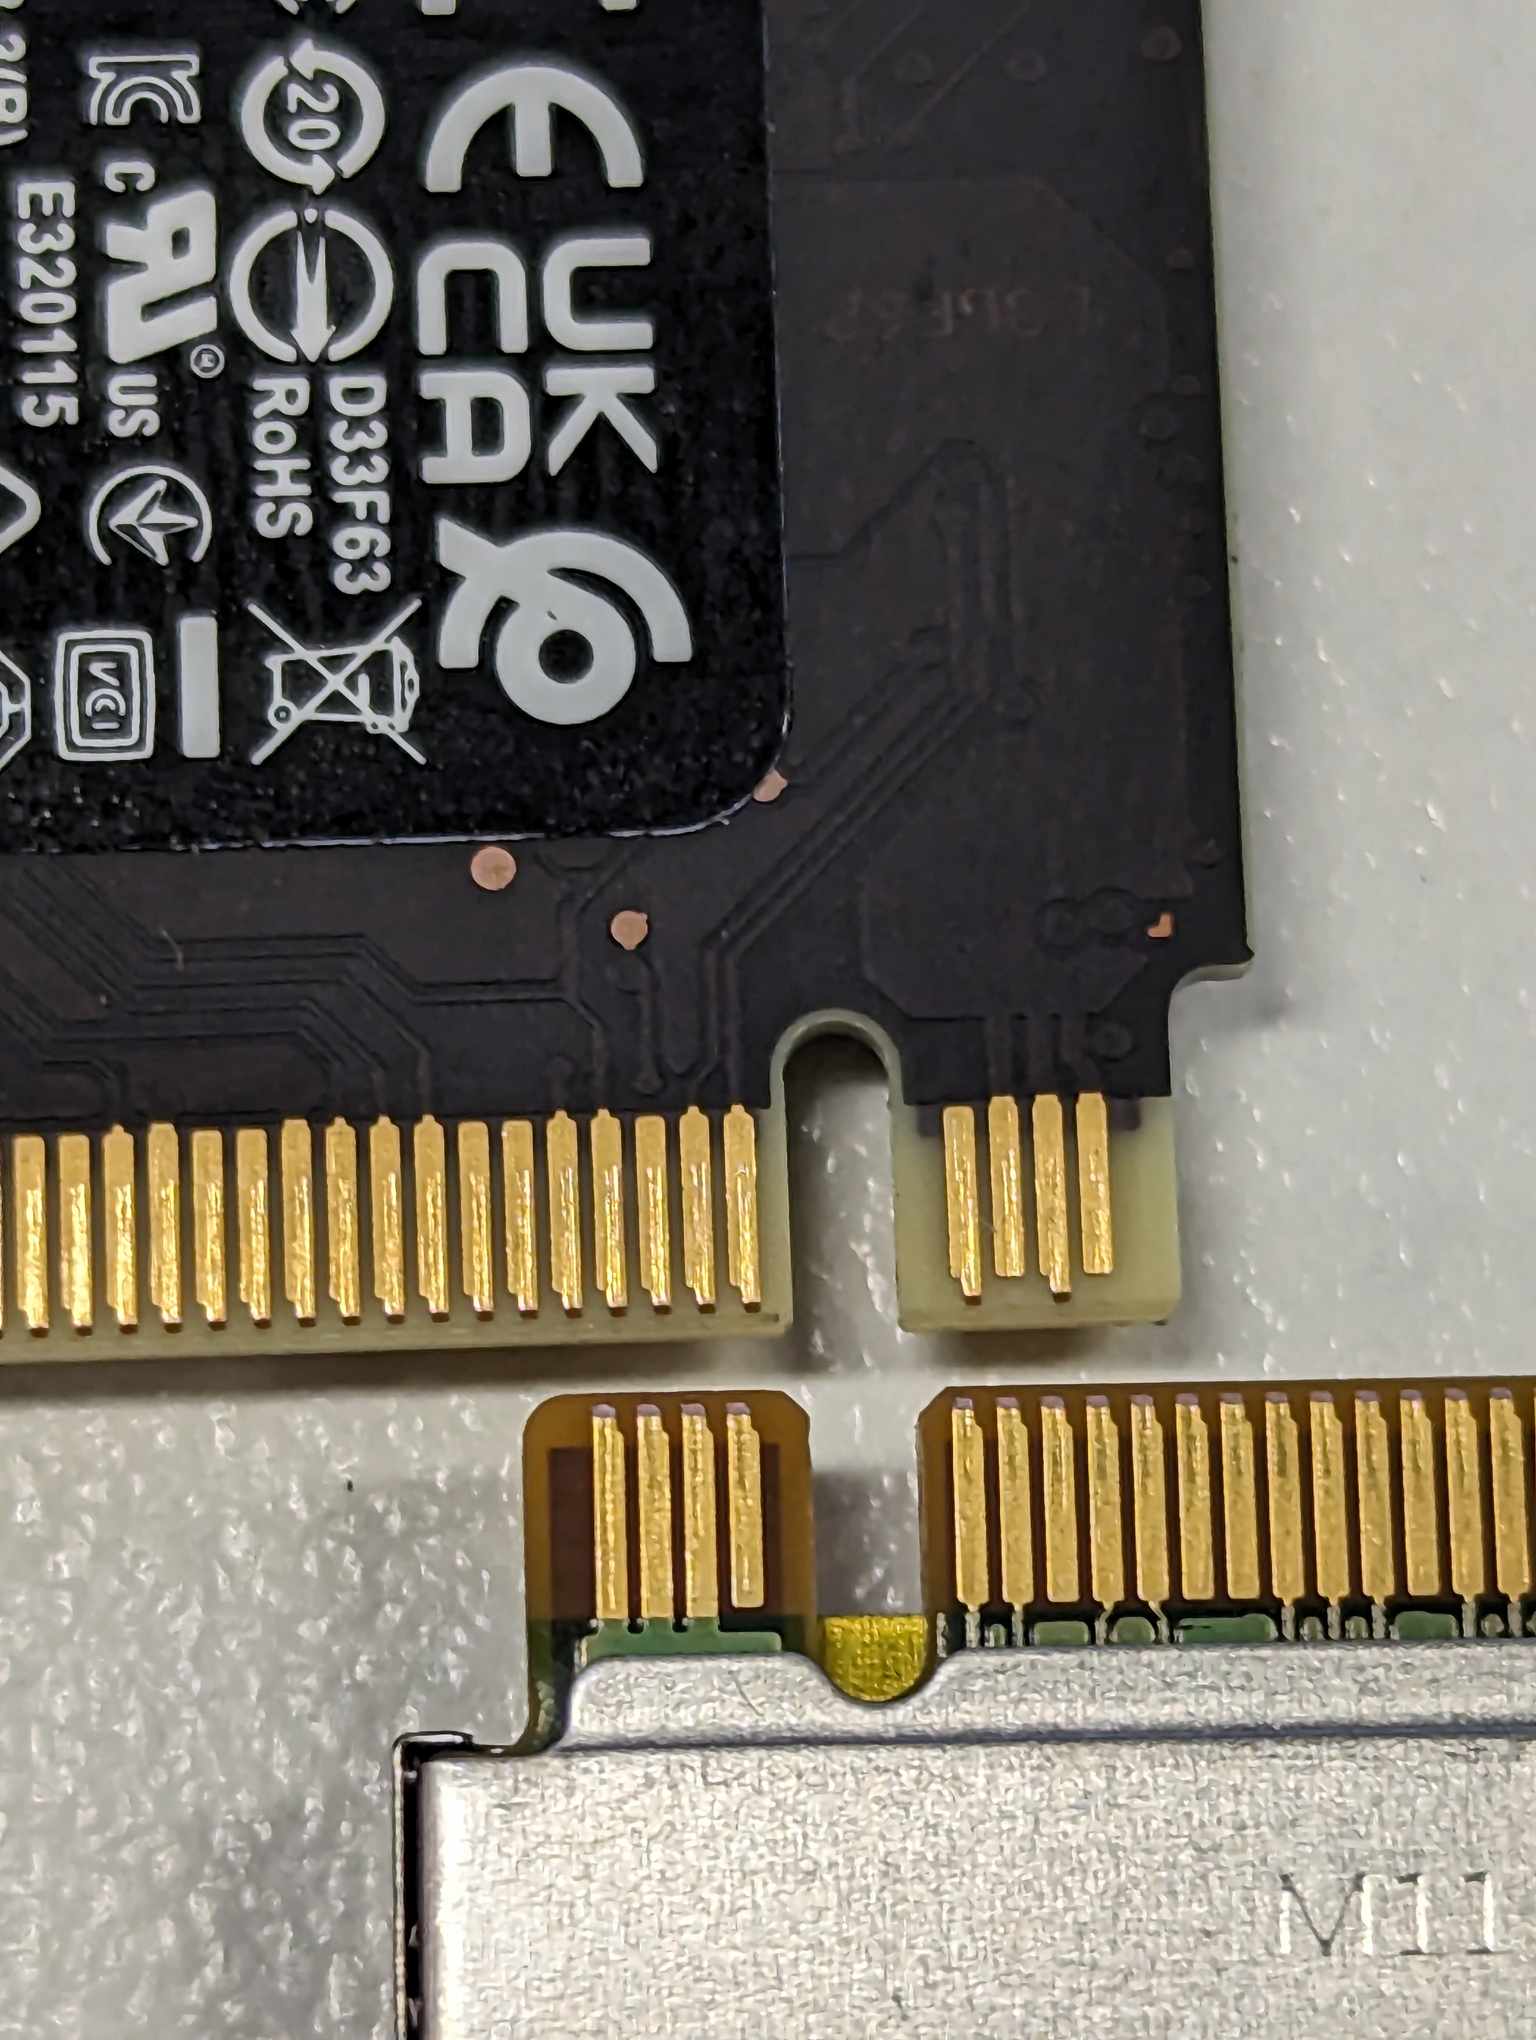
- Insert the New SSD: The first thing you should note is the old M.2 drive has a shield on it. If you look closely you’ll see that the shield sticks out into the channel slightly. This stops the drive from being pushed all the way in. Microsoft has been very sneaky here because it you push the new drive all the way in it won’t be recognised by the computer.
To fix this all you have to do is insert the drive, then pull it out as far as you can until its making full contact with the screw point. You’ll notice this is a good 1-2mm which is quite a lot. - Reassemble Your Laptop: Place the keyboard cover back over and then reinsert the screws in the back. Most likely you will have damaged the feet but you can buy replacements from Amazon.
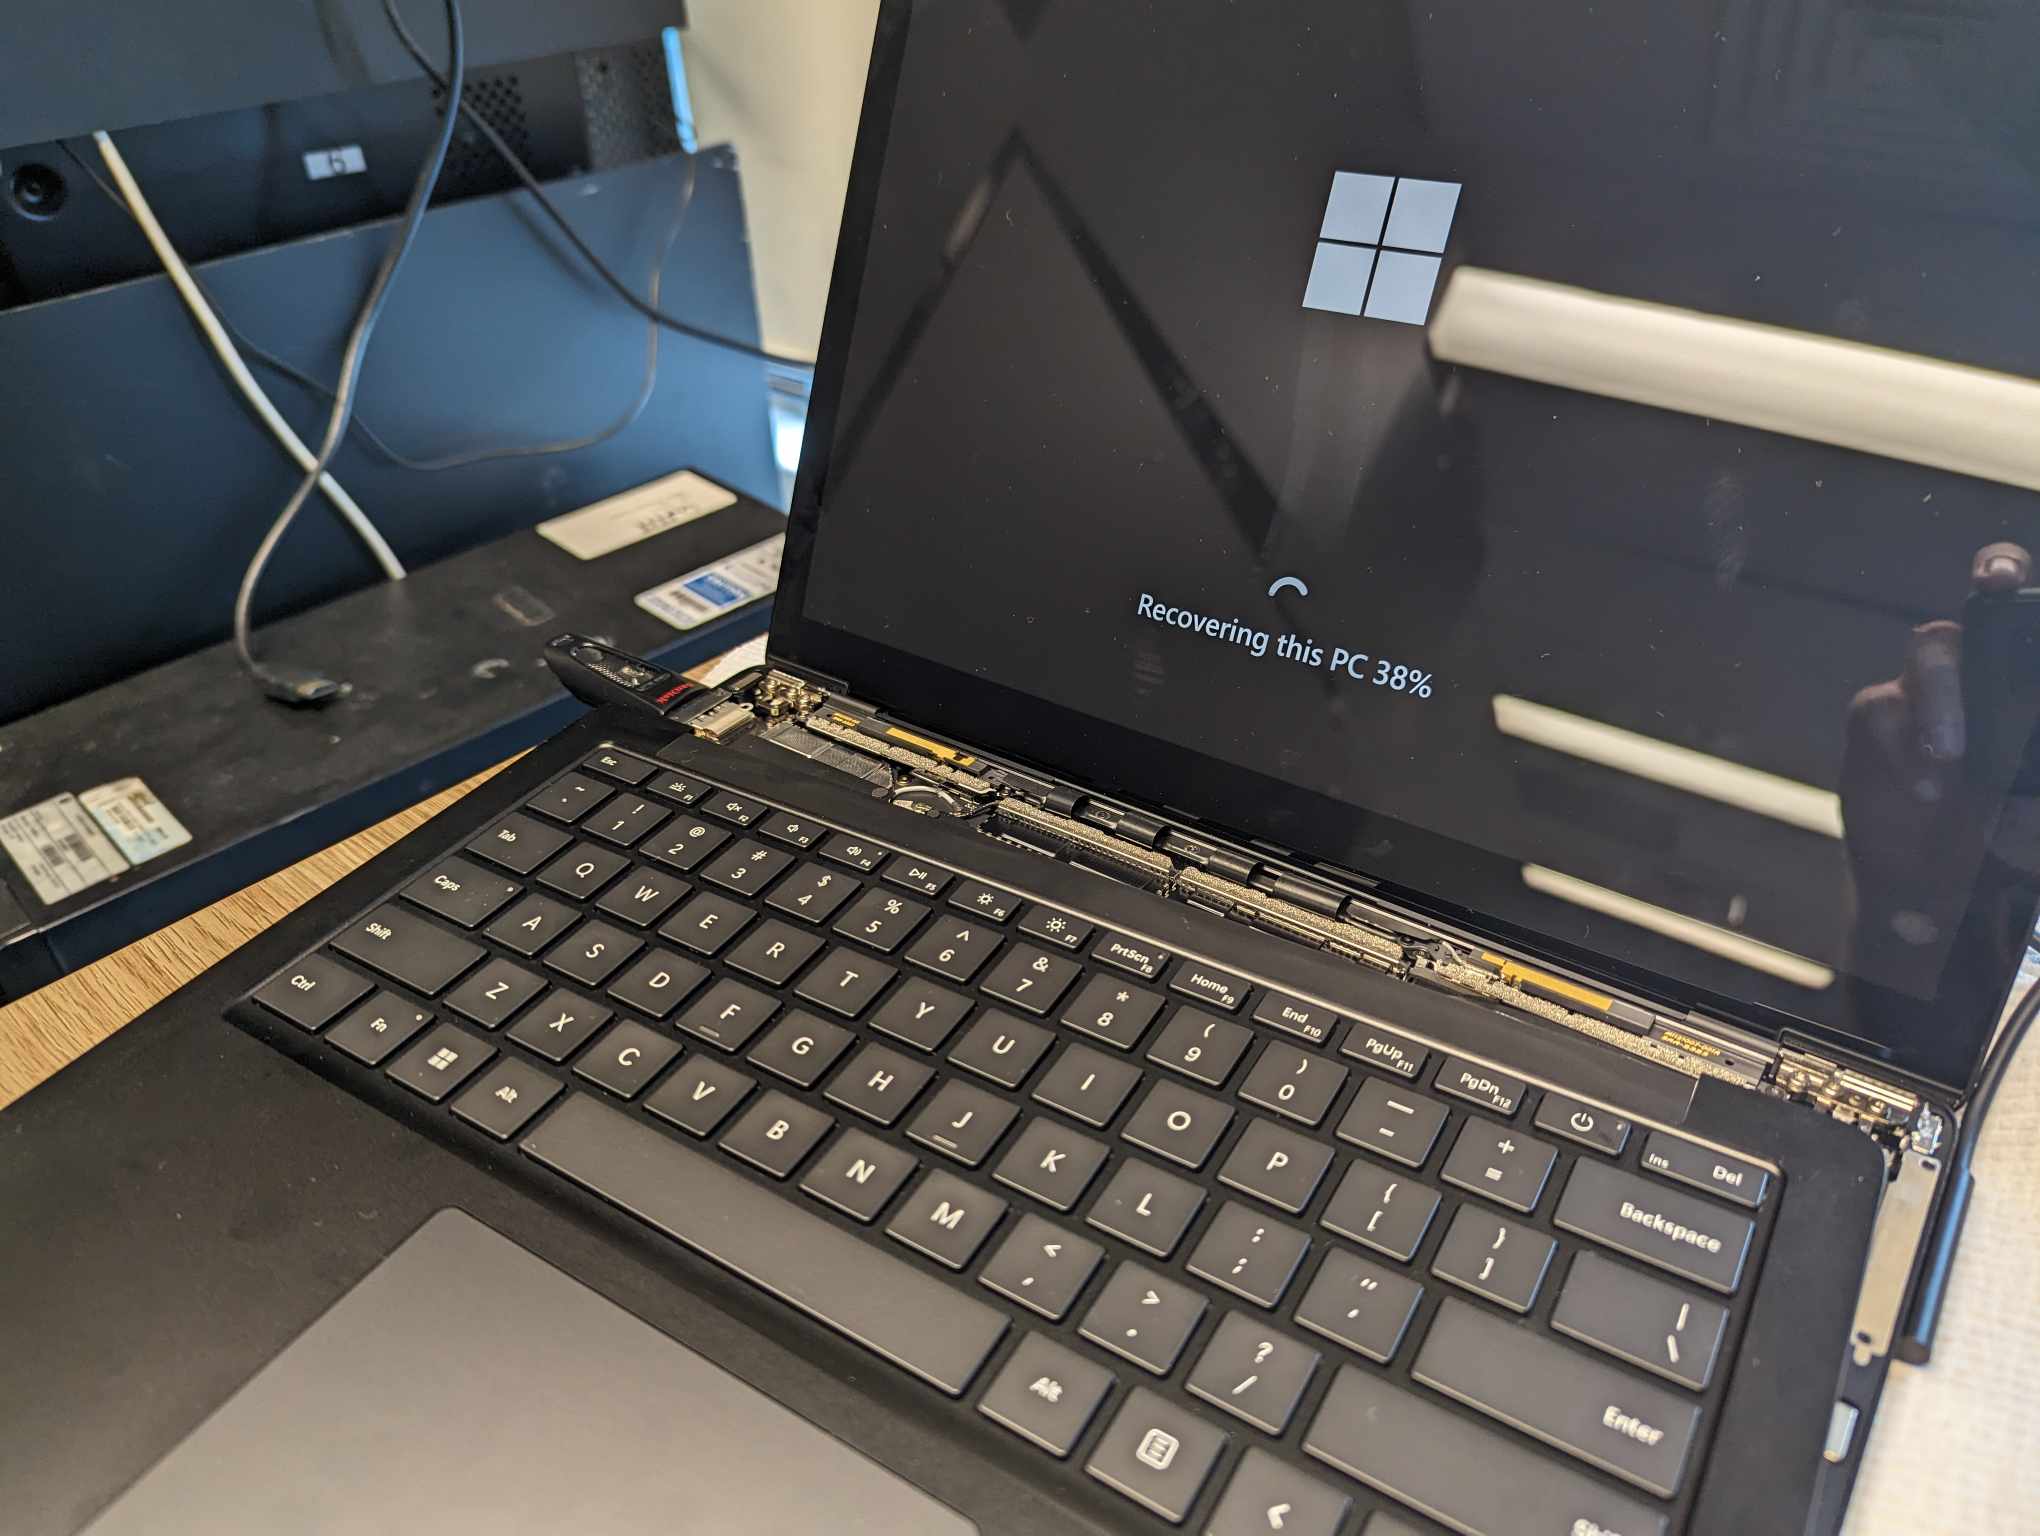
- Power Up and Install the OS: Power on your laptop and install the operating system on your new SSD. You may need to create a bootable USB drive with the OS installation files.
You can use a Windows 11 USB or create a surface recovery USB here:
https://support.microsoft.com/en-gb/surface-recovery-image